Thursday, July 28, 2016

Creative Connections 2016 Swap Card

Last weekend was my first time attending the Creative Connections event.  One of the things that happens is card swap.  I've never participated in this before so wasn't sure what to expect but decided to give it a whirl for the first time.  One of the requirements was that it was to be a current catalog item.  Well, I didn't realize until just this moment that my was a retired item.  Sorry everyone!  It was from last year's Holiday catalog called "Wonderland"


This is one of my favorite stamps set.  It just gives me a feeling of peace and tranquility that I feel on a snowy winter's night. 

This is the card front that I swapped.  The trees from "Lovely As A Tree" would also work.

 
The background, is embossed resist with the new "In" colors, Dapper Denim, Sweet Sugarplum and also Wisteria Wonder. 

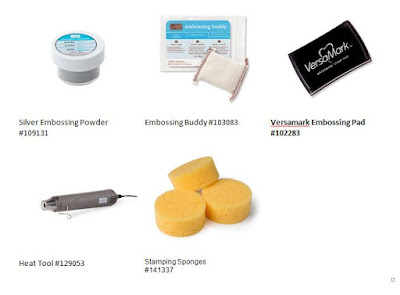
First I stamped the card base with Versa Mark embossing ink using the trees and the sentiment., then sprinkled Silver embossing powder and set it with the heat gun. 

Next I sponged the colors, Dapper Denim, Wisteria Wonder and Sweet Sugarplum, but not all the way down to the sentiment

Then I took a piece of cardstock 3.75 x 5 and using the one of the label  Thinlits from Project Life Cards & Labels set and a circle Framelit made the "frame" for the top.  (actually if you make a template like this first and use it to do your tree and sentiment stamping it will turn out better centered in the final frame).

Next, using the snowflakes from the stamp set I again embossed this on the front frame, using Versa Mark embossing ink and Silver embossing powder. 

I then ran the frame through the Big Shot using the "Softly Falling"  embossing folder.  Using Dimensionals I affixed it to the bottom sponged layer.

The base of the card is Perfect Plum.

I love how it turned out and got so many compliments on it.  I only made 20 to swap.  I was a little bit of work.  I was flattered when one of the demonstrators, whom I admired, asked me how I made it. 

If you like this, sorry you won't be able to get the stamp set but there are lots of other lovely sets that this could be used to  CASE. this (Copy And Share Everything)

Would love to hear your comments.

If you don't have a Stampin' Up demonstrator I would be honor to be able to be given the opportunity to earn your business and friendship! 


Sharon
 
 
Supplies:


Wednesday, July 27, 2016

Scrapbookers: To Type or To Write, That is the Question!

At the Creative Connections event I went to last weekend, put on by a few local Stampin' Up demonstrators, there was one thing that intrigued me as a techie.  Anyone who knows me, knows how much I love my toys. This one had to do with scrapbooking, which I don't do much of, but would like to.  All that writing, then I make a mistake and have to start all over again.  SIGH! 

One of the "On Stage" demonstrators, I believe it was Sue Lehrer, showed a scrapbooking page about her dad.  She shared how she was able to get her own handwriting in a FONT!  How cool is that!

So, of course I had to try it out myself!  I found a site,
www.MyScriptFont.  You download a sheet, write your letters on it, scan it, upload it to the site, they process it and you download and install!  All you have to do is click install.  When I went into Word, there it was on my list of fonts!!!!  Easy Peasy as my daughter, Stephanie (who is a great blogger in her own right) says! 


All I did here was type this in a Word document, copy and pasted it here!  So if I wanted I could do my whole blog in my own handwritng.  As I said, this would be great for scrapbookers. You could type out all your own journaling in a word processing document, and print it out.  How great is that!  I love it! You could do your Christmas letters in your own handwriting or even make different fonts for different projects!  LOVE, LOVE, LOVE THIS!

Pair this with Stampin' Ups Project Life kits, life couldn't be much simpler for scrapbookers!  Hope you will check out our products! 
http://www.stampinup.com/ECWeb/searchresults.aspx

Thank you Sue for sharing this last weekend!

Do you love this as much as I do? Love to hear your thoughts!

If you don't have a demonstator, I would be honored to earn your business and  love making new friends who share my passion for all things stamping, if only online!

As we say, love what we do and share what we love! Now, back to cardmaking!  Have some great ideas coming up.


Tuesday, July 26, 2016

Tuesday Tip & Technique: Hold that bow!

Ever wish you had someone to hold a ribbon down while you tied the bow?  I do, I want to get them snug enough so the ribbon doesn't slide around the card but not too tight so damage the card or make it bend. I used this little technique when tying a bow. 
 

Monday, July 25, 2016

Bonus Days Coming to a Close

blogHeader_BonusDays_cust_July0716_ENG
 
 
Did you get everything you want from the new annual catalog yet? Since it came out only a month ago, you probably still have some items on your wish list, and we have some great news for you! For every $50 USD/$60 CAD you spend in between July 7 and July 31, you’ll get a $5 USD/$6 CAD Bonus Days coupon that you can use August 2-31. This is a great opportunity to shop from your wish list, whether you buy your favorite products now or later in August with your coupons!


Friday, July 22, 2016

Happy Flowers

This is the second card that we made in class on July 19.  I CAS'd it from a card of Patty Bennett's that I found on Pinterest.  I changed up the sentiment and the flowers a bit.

I love how it turned out. The flower is from some retired paper, English Garden, and I selected a few flowers for the class and then we fussy cut them out. 


Fold Rose Red card stock in half.

With long narrow stamp from Work of Art stamp set, stamp horizontal lines on the Rose Red card about 1/2" apart.

Next we adhered the dotted strip to the card layer with some Snail.

Use Paper Piercing Matt with scrap paper on top, stamp sentiment on smaller white card stock with Mossy Meadow. (Using the paper piercing mat underneath when stamping with Photopolymer stamps, gives you a better impression.)

Stamp the sentiment on the small white cardstock. We used Mossy Meadow for this. Punch each corner of the white cardstock and the green cardstock with the triple corner punch.

Adhere the white cardstock  with the sentiment to green layer.

Attach the green/white layers to card

Fussy Cut the flower (if you don’t have Stampin’ Up’s Paper Snips, I highly recommend getting them, this scissors can get in the tiniest spaces for fine cutting)

With 1” strip of Mossy Meadow punch the leaves with the Bird Builder punch (retired).

 Adhere leaves to card layer with a glue dot.

 Attach the flower on top of leaves, with Dimensionals
 
   Loop the ribbon between the layers of the card base, at the top and tie a square knot, trim ends if needed. 
 
*can substitute Old Olive, or Always Artichoke


Supplies:

Hello Life stamp set (retired 2016 Sal-e-bration)

Work of Art stamp set (long line stamp) #134114

Rose Red Cardstock 4.25 x 11 scored @ 5.5, #102544

English Garden DSP cut out flower, (retired 2015 annual catalog)

English Garden DSP, strip of dotted 2 x 5.25, (retired 2015 annual catalog)

*Mossy Meadow cardstock, strip of 1”, leaves, (retired)

*Mossy Meadow cardstock, 3.25 x 3.5 (retired)

Bird Builder Punch, Whisper White, 3- 1/8 x 3-7/8, (retired)

Whisper White, 4 x 5.25 (for inside), #100730

Organza Ribbon, 16”, #114319

*Mossy Meadow Ink Pad, (retired)

Rose Red Ink Pad, #126954

Curvy Corner Trio Punch     

Glue Dots, #103683

Snail, #104332

Dimensionals, #104430

Paper Snips, #103579
 
 
If you like my ideas I hope you will share my blog with your friends. 
 
I'm happy to answer any questions  you may have about card making.  If I don't know the answer I will do my best to find it for you.  Also, if there is a technique that you would like to see, please let me know.  Sometimes the idea well runs dry and I welcome suggestions from you, my friends. 
 
I would be honored to earn  your Stampin' Up! business. 
 
The new holiday catalog will be coming out soon.  Anyone who has purchased from me in the last year will get the holiday catalog and also new customers will get the current catalog and a personal card from me in the mail. 
 
Bonus Days will be ending in a few days.  If you haven't done so yet, I hope you will take advantage of the opportunity.  For every $50 spent by July 30 you will receive, via email, a $5 coupon that can be use for August purchases.  My online store is open 24/7.  Hope you have a few minutes to check out all the beautiful products. 
 
Thank you for stopping by, and as always, I appreciate your comments.
 
God Bless!

Wednesday, July 20, 2016

Flamingo Hello!

This is my favorite card from our class yesterday.  When I saw this on Pinterest I had to have the supplies.  It was posted by Els de Haan on Splitcoaststampers.  de Haan sounds like a Dutch name to me, I'm half Dutch.  So no wonder it's beautiful!  :-) (a little tongue in check there). 

I'm also partial to flamingos, I loved all my trips to Florida and was actually planning to move there until I met my husband.  He passed away 8 years , we were only married 5 months. Love of my life. That's another story. 

Anyway,  love, love, love this card!  Thank you Els. It was so much fun to make.  I may have to make more, I don't know that I want to give this away or sell it. 

I sell my cards at a craft fair in December at King of Kings church in Woodbury, Minnesota.  Huge craft fair first Saturday in December, if you are in the area at that time stop in.  I'm sure you will find something that you will love. Again I have digressed. 

 Supplies:
Pop of Paradise stamp set, #141581
Botanical Builder Framelits, #140625
Certainly Celery cardstock 5.5 x 8.5
Flirty Flamingo cardstock 5.25 x 4,  #141416
Whisper White cardstock (2) 5.25 x 4-1/8
Whisper White cardstock scrap, #100730
Mossy Meadow cardstock scrap
Yellow scrap cardstock
Flirty Flamingo ink pad, #141397
Pear Pizzazz ink pad, 131180
Circle Thinlits or 1-3/8” circle punch, #141705/#119860
3/8” Flirty Flamingo Runched Ribbon (2) 1.5 pieces, #141426
Stamping Sponge, #141337
Glue Dots, #103683
Dimensionals, #104430
Snail, #104332
 Directions:

  1. Score the Mossy Meadow cardstock in half at 4.25"
  2. Adhere the Flirty Flamingo cardstock to the Mossy Meadow card layer.
  3. Using the smaller rounded leaf ink up with Pear Pizzazz and stamp three times in upper right corner without re-inking (3 generation inking) on the Whisper White
  4. Using the long frond stamp, on lower left stamp 2 times without re-inkingInk up the sponge in the Pear Pizzazz and sponge some “grass” on the lower right side.Stamp the “Hello” on the white scrap with Flirty Flamingo
  5. Using either the 1-3/8” circle Thinlet or 1-3/8” punch, die cut or punch the Hello circle
  6. With Big Shot cut 2 of  the palm frond die cut out of Mossy Meadow scrap
  7. Cut two of the smaller leaf punch out of the Mossy Meadow cardstock scrap
  8. Cut the flower die cut out of the Flirty Flamingo with the Big Shot
  9. Cut the small flower center die out of a scrap of yellow
  10. Affix one of the palm fronds to the top left of the card with a glue dot
  11. On top of this frond attach the Hello circle with a Dimensional
  12. Taking the ribbon pieces lay one over the other at an angle and attach with glue dot, the attach these to the card stock with a glue dot
  13. Lay one of the small die cut leaves on top of the ribbon facing downward
  14. Attach the other palm frond to the card layer on top of the stamped fronds, facing up
  15. Attach the other leave on top of the palm frond
  16. Attach the flower on top of the leaves with a Dimensional
  17. Attach the flower center to the flower with a glue dot.
  18. Affix this layer to the card base
  19. On the second Whisper White layer stamp two leaves to the bottom right of the card insert, with Pear Pizzazz without re-inking.
  20. Attach this inside the card.
 
If you have any questions about making this card, please let me know.  As always, I appreciate comments.  Thank you for letting me share my passion of making cards with you.  Hope you enjoy this one. 
 
Supplies can be purchased in my 24/7 online store, www.sharonbrennan.stampinup.net.  I appreciate the opportunity to earn your business.  New clients will get a personal thank from me in the mail.  You will also be added to my catalog mailing list if you have ordered from me in the last year. 


Saturday, July 9, 2016

Endess Birthday Fun!

How's your summer going?  It's pretty warm today, which I don't mind, but humid, which makes it harder to bear.  Days like this I think of my parents.  My dad passed away in January and my mom lives in an apartment now.  But before dad went to the nursing home and mom moved into an apartment they lived in their own home, into their 90's and never, never, never had air conditioning.  I don't know how they did it.  They did have some huge shade trees, fans in the windows, and kept their blinds drawn partway to keep the sun out. Amazingly strong and hearty people.

I thought I'd share with you the third card we made in our June Cottage Lane Stamper's Class.  We used the Stampin' Up! "Endless Birthday" set.


I love this set. It is so versatile. Any time I can use the individual sentiments and create my own I'm happy.  As a matter of fact that's what my class did. They used the other greetings in the set to make their inside sentiments. 

The base layer is Melon Mambo with the top layer in Whisper White and embossed with the Confetti Textured embossing folder.  I love this folder, it has a an oval negative space in the middle, making so versatile.  We layer three 1.5" banners about 2.5" long on top of the embossed layer.  In my sample I used the retired Ornate Tag Topper punch for my tag, in class we used the Scalloped Tag Topper punch.  It just gives it a little extra sumpin', sumpin'. 

We stamped the birthday cake on the tag using the new Archival Basic Black ink.  (Tip: the Archival Black ink will stain your photopolymer stamps but will not affect future stamping.  Just make sure to clean right away.)

With a little ink in the lid of our stamp pads (by squeezing the bottom and top together before opening) we used the Aqua Painters to color the birthday cake. The colors we used were Melon Mambo and Always Artichoke.   I like to work from one side to the other with my Aqua Painter, on the stamped image.  It goes from dark to light giving it a little more depth. 

I used a retired yellow Stampin' Writer to color the candles and flames but our Daffodil Delight would work just as well.  The cake was embellished with 3 rhinestones.

I have A LOT of ribbon that I purchased before I became a Stampin' Up! demonstrator, so we used a little of that to finish off our tag. 


Supply List:

Endless Birthday stamp set #140273
Confetti Textured embossing folder #140592
Aqua Painters #103954
Melon Mambo cardstock #115320
Whisper White cardstock #100730
Archival Basic Black ink pad #132708
Melon Mambo ink pad #126948
Always Artichoke ink pad #12953


Sheltering Tree

I have to tell you every time I go to say or type anything about this Stampin' Up photopolymer stamp set, "Sheltering Tree"  I want to say Sheltering Spruce.  I lived on Sheltering Spruce in Chugiak, Alaska, many years ago.  We had many trees on our lot, mostly Aspen and Black Spruce.

I did a little different take on this project.  I have done a framed before, and this time I had an idea to make it look more like a matted picture. This was the second thing we did in the June Cottage Lane Stampers class. 


We used a 4" x 6" frame from the Dollar Tree (don't you just love finding little nuggets there?)

The tree was stamped in Tip Top Taupe, the grass is Pear Pizzazz, the lighter pink for the tree leaves is Pink Pirouette and  the darker pink is our new 2016-2017 trend color  Flirty Flamingo.  I love this color!

The swing was stamped in Soft Suede.  Using the Confetti Hearts border punch we punched out hearts in Pink Pirouette and attached them to the picture with glue dots.  The sentiment is also stamped in Pear Pizzazz. 

Using a sheet with the hearts on it from the Love Blossom stack from the Occasion's catalog and a frame from the Project Life Cards & Labels Framelits and one of the smaller sentiment frame, I created a "mat" for my tree and sentiment.  For my class I did the cutting of the mat before hand, to save time and also created a template out of heavier card stock so that they would be able to stamp the tree and sentiment in the spots I had made with the template. 

I did not attach the matt to the picture, just laid it in the picture frame and voila! I think it looks springy.  What do you think? 

Supplies:

Whisper White Card stock 4x6: #100730
Love Blossoms card stack 4 x 6:
Pink Pirouette card stock: #111351
Project Life Card & Label Framelits: #135707
Sheltering Tree stamp set #137163
Pink Pirouette stamp pad #126956
Flirty Flamingo stamp pad #141397
Tip Top Taupe stamp pad #138325
Soft Suede stamp pad: #126978
Pear Pizzazz stamp pad: #131180
Glue Dots #103686
Confetti Hearts Border Punch #137415
Clear Blocks #118491
frame from $$ store


Sheltering Tree Photopolymer Stamp Set
Project Life Cards & Labels Framelits Dies


Pink Pirouette 8-1/2" x 11" CardstockWhisper White 8-1/2" x 11" Cardstock


Pink Pirouette Classic Stampin' Pad
Pear Pizzazz Classic Stampin' Pad


Soft Suede Classic Stampin' Pad
Tip Top Taupe Classic Stampin' Pad
Confetti Hearts Border PunchFlirty Flamingo Classic Stampin' Pad

Clear Block Bundle


Mini Glue Dots


Wednesday, July 6, 2016

Bonus Days!!! Earn in July, Spend in August!


Get ready for a new promotion that begins tomorrow! BONUS DAYS . . . For every $50 you spend* between July 7 and July 31, you’ll get a $5 Bonus Days coupon that you can use between August 2–31, 2016. This is a great opportunity to get items from your wish list, whether you buy them now or with your coupons in August! (*All orders qualify . . . online, in class or at a party, or via email to me. Coupon codes will be sent via email, so you must have a valid email when you order.)

Friday, July 1, 2016

Celebrations!

June Stampin' Class
 

This month's cards in our Stampin' Club were all about celebrations. 

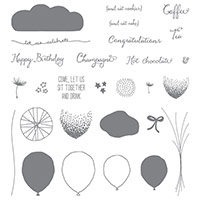
Stampin' Up! has come out with the cutest balloon bundle, called Balloon Celebrations. Not only is it wonderful for birthdays, but 4th of July, graduations, even wedding and anniversary celebrations.

Ours was meant to be a graduation card. 

Balloon Celebration
 
 
The colors are Crushed Curry and Black.  I love, love, love the new Archival Black that Stampin' Up has come out with.  Such nice crisp colors. 
 
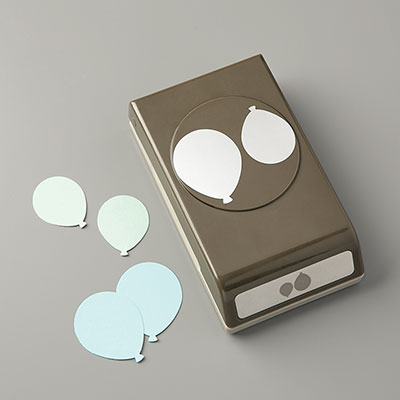
Bundled with this stamp set is the Balloon Punch.  We also used the retired mini banner punch to make our little bow, that "Congratulations" is stamped on.
 
A tip with the Balloon punch.  Find a heavy piece of card stock and punch out the balloons.  Us this as a template for stamping your balloons.  That way when go to punch out your balloons they are already lined up with the punch.
 
This card also has a black layer underneath the top layer.  Dimensionals were used under the black layer to give it ......Dimension!
 
One of my stampers preferred to do it in navy and gold, since those were the school colors for her graduate.
 
I love the sentiments in this one, they look like the sentiment is spelled out in string. 
 
Hope you like it.  As always love to hear your comments!
 
To purchase any of the supplies, please go to my store: http://www.sharonbrennan.stampinup.net

Here are the supplies:


Balloon Celebration Photopolymer Stamp Set
Balloon Celebration #140675
Crushed Curry 8-1/2" x 11" Cardstock
Crushed Curry #131199

Crushed Curry Classic Stampin' Pad
Crushed Curry #131173


Basic Black Archival Stampin’ Pad
Basic Black Archival #140931
 
Balloon Bouquet Punch
Balloon Punch #140609


Basic Black 8-1/2" x 11" Cardstock
Basic Black #121045

Whisper White 8-1/2 x 11 Cardstock
Whisper White #100730


Stay tuned for the second card that we did in class! 


Tips on Organizing new stamp sets & dies/bundles and using Pinterest

 Not being organized makes me go in a tizzy!  I like to be able to put my hands on a stamp set when I'm creating a card.  Looking for a ...