Wednesday, May 26, 2021

Debut of New Kits Collection! May 21, 2021 "Tuesdays At Two"

 Kits, kits, kits!  No I'm not talking about cute and furry little kittens. I'm introducing some of the new kits in the Stampin' Up! new collection of kits.  No worries, Paper Pumpkin is not going away.  

This new Kits Collection is geared toward people who may be just starting out in paper crafting, don't have a lot of money or time to spend on making cads, or feel they don't have enough creativity to make cards.  I know, coming up with a design for a card can be daunting!  I suppose much like an author staring a piece of blank paper or screen or an artist at a blank canvas.  I've been there.  Kits are also great for people who don't have a lot of space to craft but want to give something meaningful to someone they care about. 

I love that kits because they come with everything to create the cards or 3D projects, even a clear block to mount the stamps, but especially the beautifully, lined coordinating envelopes!  The only thing you may need is a paper snips.  Just put them together and mail them out! 

Some kits will have stamping, some will not. The Kerchief Card kit is an example of this. 

The first few kits, that are debuting to our customers on June 1, 2021, are some of my favorite kits that are repurposed Paper Pumpkin kit. 

With no further adieu may I present the six that I have chosen to start off with! If the video, below,  does not show up on your mobile device, click here

In conjunction with these new kits, I'm also offering two new Kit Parties!  One in person and one virtual.  It's pretty simple to attend, no cost is involved except the purchase of your kit.  Buy it about 2 weeks before the get together. Bring it to my house or join us on Zoom and we put them together.  Easy peasy! It will be so much to find out which kit everyone has chosen.  See my calendar of events here for all the details.  

Here are a few photos of the kit bits and pieces that I showed on the video.  The names and item numbers are on the photos.  


Thanks for stopping in!

Sharon

Images © Stampin' Up!

Wednesday, May 19, 2021

Fine Art Gallery: Step Up Your Cards

 Yesterday's Facebook Live did not go the way I had planned.  When I started making my cards for demonstrating on my "Tuesdays At Two" Facebook Live I had one idea in mind.  When I got to the third sample card, well it changed my mind entirely to a different card.

I knew I wanted to use the "Fine Art Gallery" bundle. I think the flowers are simply gorgeous and look like something from a painting, as the name implies. The video from yesterday is below, if it doesn't show up on your mobile device, click here.


This is the card I made during the video. I CASE'd it from Julie Gilson and added my own little twist to it using negative and positive pieces from the die cut on the sentiment.  

In the video I show how you can step up your cards, a simple card for the beginners. This card is simply stamping and a few cuts with your paper cutter. The sentiment is simply stamped right on the card base. A few epoxy dots are added to dress it up a bit.


This second card is a step up from that for the casual stamper.  It has an embossed background layer, using the "Painted Textures" 3D embossing folder. I also punched a background layer for the sentiment and popped it up with a couple Dimensionals. Both of the layers for the flower are scored around the edges with the Stampin' Up!© Paper trimmer. 

This third card, for the more Avid stamper, has two embossed layers, die cut images and a bit of Baker's Twine as well as a die cut sentiment. 

I also showed another card using the Painted Textures 3D embossing folder and some Pumpkin Pie ink. This card was CASE'd from Patty Dolan.  I used a different die cut for the sentiment, from the Scalloped Contours die set.  I was totally surprised when I found that it leaves little cut marks around the edge of the die, so you could actually slip something behind it.  I couldn't think of anything so I left it as is. 
These last two card were actually my original ideas on how to use the negative parts of a die cut as well as the positive die cuts from the "Just Wanted To Say" die from the Floral Gallery dies.  I love how they both turned out. I used the coordinating "Fine Are Floral" DSP.

Positive die cut image
 

Negative die cut image
 

Dimensions of the Avid card:

Whisper White:
  • 8 1/2" x 5 1/2", scored at 4 1/4"
  • 3" x 4 1/4"
  • 4" x 5 1/4"
Magenta Madness:
  • 3 1/8" x 4 3/8"
  • 4 1/8" x 4 3/8"

SUPPLIES: purchase the supplies with one click here.

Art Gallery Bundle
#156227

Art Gallery stamp set
#154421
 

Floral Gallery dies
#154316
 

Scalloped Contours dies
#155560


Dainty Diamonds
3D Embossing Folder
#152702

Painted Texture
3D embossing folder
#154317

Fine Art Gallery
Designer Series Paper
#154558

Basic White cardstock
 #159276


Magenta Madness
#153117
 

Magenta Madness cardstock
#153080
 

Old Olive
#147090
 

Everyday Label punch
#144668
 

Mossy Meadow
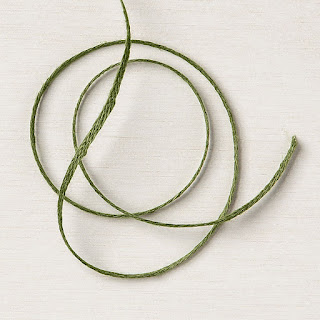
Braided Linen trim
#154298
 

Stampin Dimensionals
#104430
 

Stampin Seal+
#149699

2020 - 2022 In Color
 Square Gems 155572


Thank you for stopping by.  If you enjoyed these projects, please subscribe!

Sharon Brennan

Images© Stampin' Up!


My intent was to show 

Tuesday, May 11, 2021

Pansy Petals "Tuesdays At Two" Birthday Card

 Today's "Tuesday At Two" features the "Pansy Patch" bundle.  Pansy's always remind me of two people, my paternal Norwegian grandmother, who was a great baker and gardener.  She always had Pansies.  And my friend, Norma, who taught me, later in life, about Pansies and how they were great for cooler temps, like we have here in Minnesota.  

I CASE'D this card from lynnslocker.  I made a couple of changes, as usual.  😀


This card is for a more avid stamper, it has a lot of moving pieces.  I did a little stamping as well as die cutting and assembling the larger main pansy and the smaller bud off to the side.

I also wanted to make a couple of simpler cards for the more casual stamper.  This one is mostly die cutting, cutting the flowers from the coordinating DSP Pansy Petals. The sentiment is simply stamped on the white card base.
In this 3rd card incorporates some stamping and a little die cutting. 
I found, when stamping the flowers, it's easier to line up if you stamp the darker, detail stamp first.  You can used the same color ink for both steps, which is good if you are just starting out and can't afford to get all the inks.  I stamped off the background (lighter color) once, using the new Fresh Freesia ink.  I think this is going to be one of my favorites! I stamped them on Basic White cardstock and then die cut them.

The bud on the stem, off to the side, is also stamped. I love that they brought back some gingham with this DSP.  Apparently I'm not the only one that's a fan of gingham.  It always looks so neat and clean.

Here is today's video, if the video does not show up on your mobile device, click here


The cardstock dimensions:
Basic White:
  • 8 1/2" x 5 1/2" scored at 4 1/4"
  • 2" x 1 1/2" flower base
  • 2 1/2" x 5/8" sentiment
Fresh Freesia:
  • 5 3/8" x 4 1/8"
  • 1 1/2" x 6 flowers
Blackberry Bliss:
  • 2 3/4" x 4" flower outer edges and insides
Old Olive:
  • 3 1/2" x 1 1/4" leave detail
Pear Pizzazz:
  • 1 1/2" x 2" leaves and stem
Crushed Curry
  • scrap for flower centers
Pansy Patch Designer Series Paper
  • 3 3/8" x 4 5/8" background layer
  • 3/4" x 2 3/4" sentiment
SUPPLIES: CLICK HERE TO PURCHASE

Here are the supplies that were used:


Pansy Patch bundle
#155674

Pansy Patch stamps
#154999
 

Pansy Dies
#155680
 

Scalloped Contours #155560
 

Pansy Petals DSP
#155807
 

Fresh Freesia #155613
 

Basic White
#159276
 

Blackberry Bliss #133675
 

Old Olive
#100702


Fresh Freesia
#155613


I hope you enjoy this project.  Thank you for stopping by!

Sharon


Images© Stampin' Up!

Tuesday, May 4, 2021

Cruising through the New 2021 -2022 Annual Catalog

 Today, May 4, 2021 the new 2021 - 2022 Annual Catalog debuts.  Join me in this video as I highlight some new information, tips and ideas. Click here if the video does not show up on your mobile device.


Thanks for stopping by.  Make sure to subscribe so you don't miss any updates.

Sharon

Images © Stampin' Up!


Saturday, May 1, 2021

Custom Made Envelope for Stand Up Graduation Card

On April 27, 2021 for my "Tuesdays At Two" FB Live I shared a graduation fun fold card that I called "Head & Shoulders Above the Rest" because it reminds me of a graduate student in their cap and gown, looking down and seeing the stripes on their gown and the back of their graduation cap, complete with tassel.  Today I created a custom envelope for this card with a liner, using the Envelope Punch Board.


Here's a link to card video. Unfortunately the card will not fit into an A2 size envelope, our standard card size.  So this morning I did an impromptu FB Live "au naturel", so very spur of the moment.  LOL but I was so excited to share this.  But unfortunately the sound was really muted so I redid the video with my little camcorder. Here's the video from YouTube.  If it does not show up on your mobile device click this link.

Here is the envelope and card.  

To make it I used my Envelope Punch Board, which Stampin' Up!© no longer sells. I also used a calculator for this board that I had on my phone.  I initially found on Pinterest, created by Sylvie L.  I tried to copy the link here for you but it didn't work.  There are several others out there. I asked it for the sizes of a 5" x 5" card 1/4" thick.  There are also measurements for other size items on the Envelope Punch Board itself.  To be honest I totally forgot to look there!  LOL

The calculator stated to use a 8 5/8" x 8 5/8" piece of cardstock.  Since I didn't have any on hand larger than 8 1/2" in the weight and color I wanted, I decided to use regular cardstock that you can get at Walmart, (since it is lighter weight than our Basic White but thicker than copy paper.)  As luck would have it, that worked out.

Start with the first measurement of 4 3/8" on the Envelope Punch Board. Then follow the directions of the board. You can see how this is done in the video. 

After putting together the first one (purely by luck, which I will explain later) I decided to stencil a graduation cap on it.  I had some die cuts left over from something I did previously and used it for my stencil.  I used the new blender brushes but unfortunately I ended up getting some smear marks on the envelope.  So what do we do when we mess up?  We turn it over and start again, but in order to do that I decided to make a liner for the envelope.

Once you have the envelope punched and scored you can make the liner.  I used a piece of DSP 8 1/2" x 5 1/4".  I also used the score board to get the angles right for the top (peak) of the envelope. Starting with the short edge of the liner at 2 5/8, after making this score line, I flipped it over to do the other side and then cut the corners off with my paper trimmer.

Or you can mark the center of the short end 2 5/8 and down along the side 3", draw a line between these two points and cut of the corner.  Do the same for both sides.  I also used a corner rounder for the peak of the liner.  

Insert the liner on the envelope while is it still open. (TIP: This is where the lucky part came in, I found out after doing my video that the envelope is slightly wider one way. Put the shorter sides to the top and bottom, which is why I was fumbling around in the video)  I would recommend glue to adhere it.  Just glue the top side, so the liner can move up and down a little when you open and close the envelope. 

After you have the liner inserted you can fold in the two sides of the envelope, burnish the score lines and the put a strong adhesive on the bottom points of the envelope and close it up.  You are finished!

If you enjoyed this project, please subscribe.  

Sharon


Images © Stampin' Up!


Tips on Organizing new stamp sets & dies/bundles and using Pinterest

 Not being organized makes me go in a tizzy!  I like to be able to put my hands on a stamp set when I'm creating a card.  Looking for a ...